Mochi ice cream
Mochi ice cream is a quite young frozen invention! Luckily for us, wrapping tasty Japanese rice dough around ice cream is very easy to do at home too: get hold of the proper sweet rice flour and your micro-wave will fix the dough for you in less time than it takes to whistle the theme song from Totoro! (for ice cream, you can use any ice cream you have at hand, and you won’t even need very much!)
Mochi ice cream – even if the home-made form may lack some of the “industrial perfection” of commerical ones, it still both looks and tastes delicious!
Of mochi daifaku, legends and mochi ice cream
Mochi daifaku is a classic (non-frozen) Japanese dessert: a rice-dough bun usually filled with red bean paste or other enticing things. Yes, the dough is based on rice (the sweet glutinous kind also used for sushi). And guess what? – Japan actually has its own special Shinto God of rice, Inari Ōkami: an often rather androgyne kami frequently depicted together with their special animal, the white fox.

Inari, the kami of rice (as well as of many other things, like tea, fertility and worldly success) meeting a warrior. One could wonder if the picture aims to illustrate a theme of “rice being mightier than the sword”. However, Inari is also the patron kami of blacksmiths and warriors, so I doubt it 😉
So what about mochi ice cream? No ancient history at all, actually – it was first in the 1990’s that the Japanese-American businesswoman Frances Hashimoto decided to follow up on her husband Joel’s fusion idea and created what soon became one of the most enduring and successful “novelty frozen” desserts in decades.
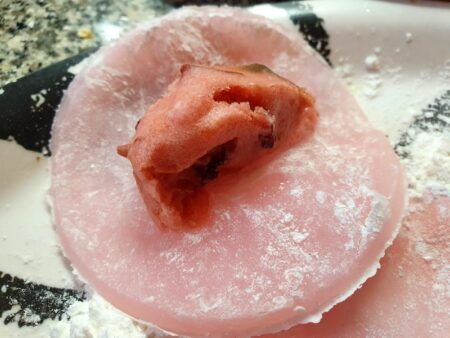
Closed and dusted, ready to firm up in the freezer!
Why has mochi ice cream become so popular? Well, beyond the obvious fact that they taste good, some market-savvy people claim that mochis are perfect snacks for “millennials who are looking for something different”, since mochis are “weird” (in a good way), handheld, portable and offer both “portion control” and indulgence at the same time.
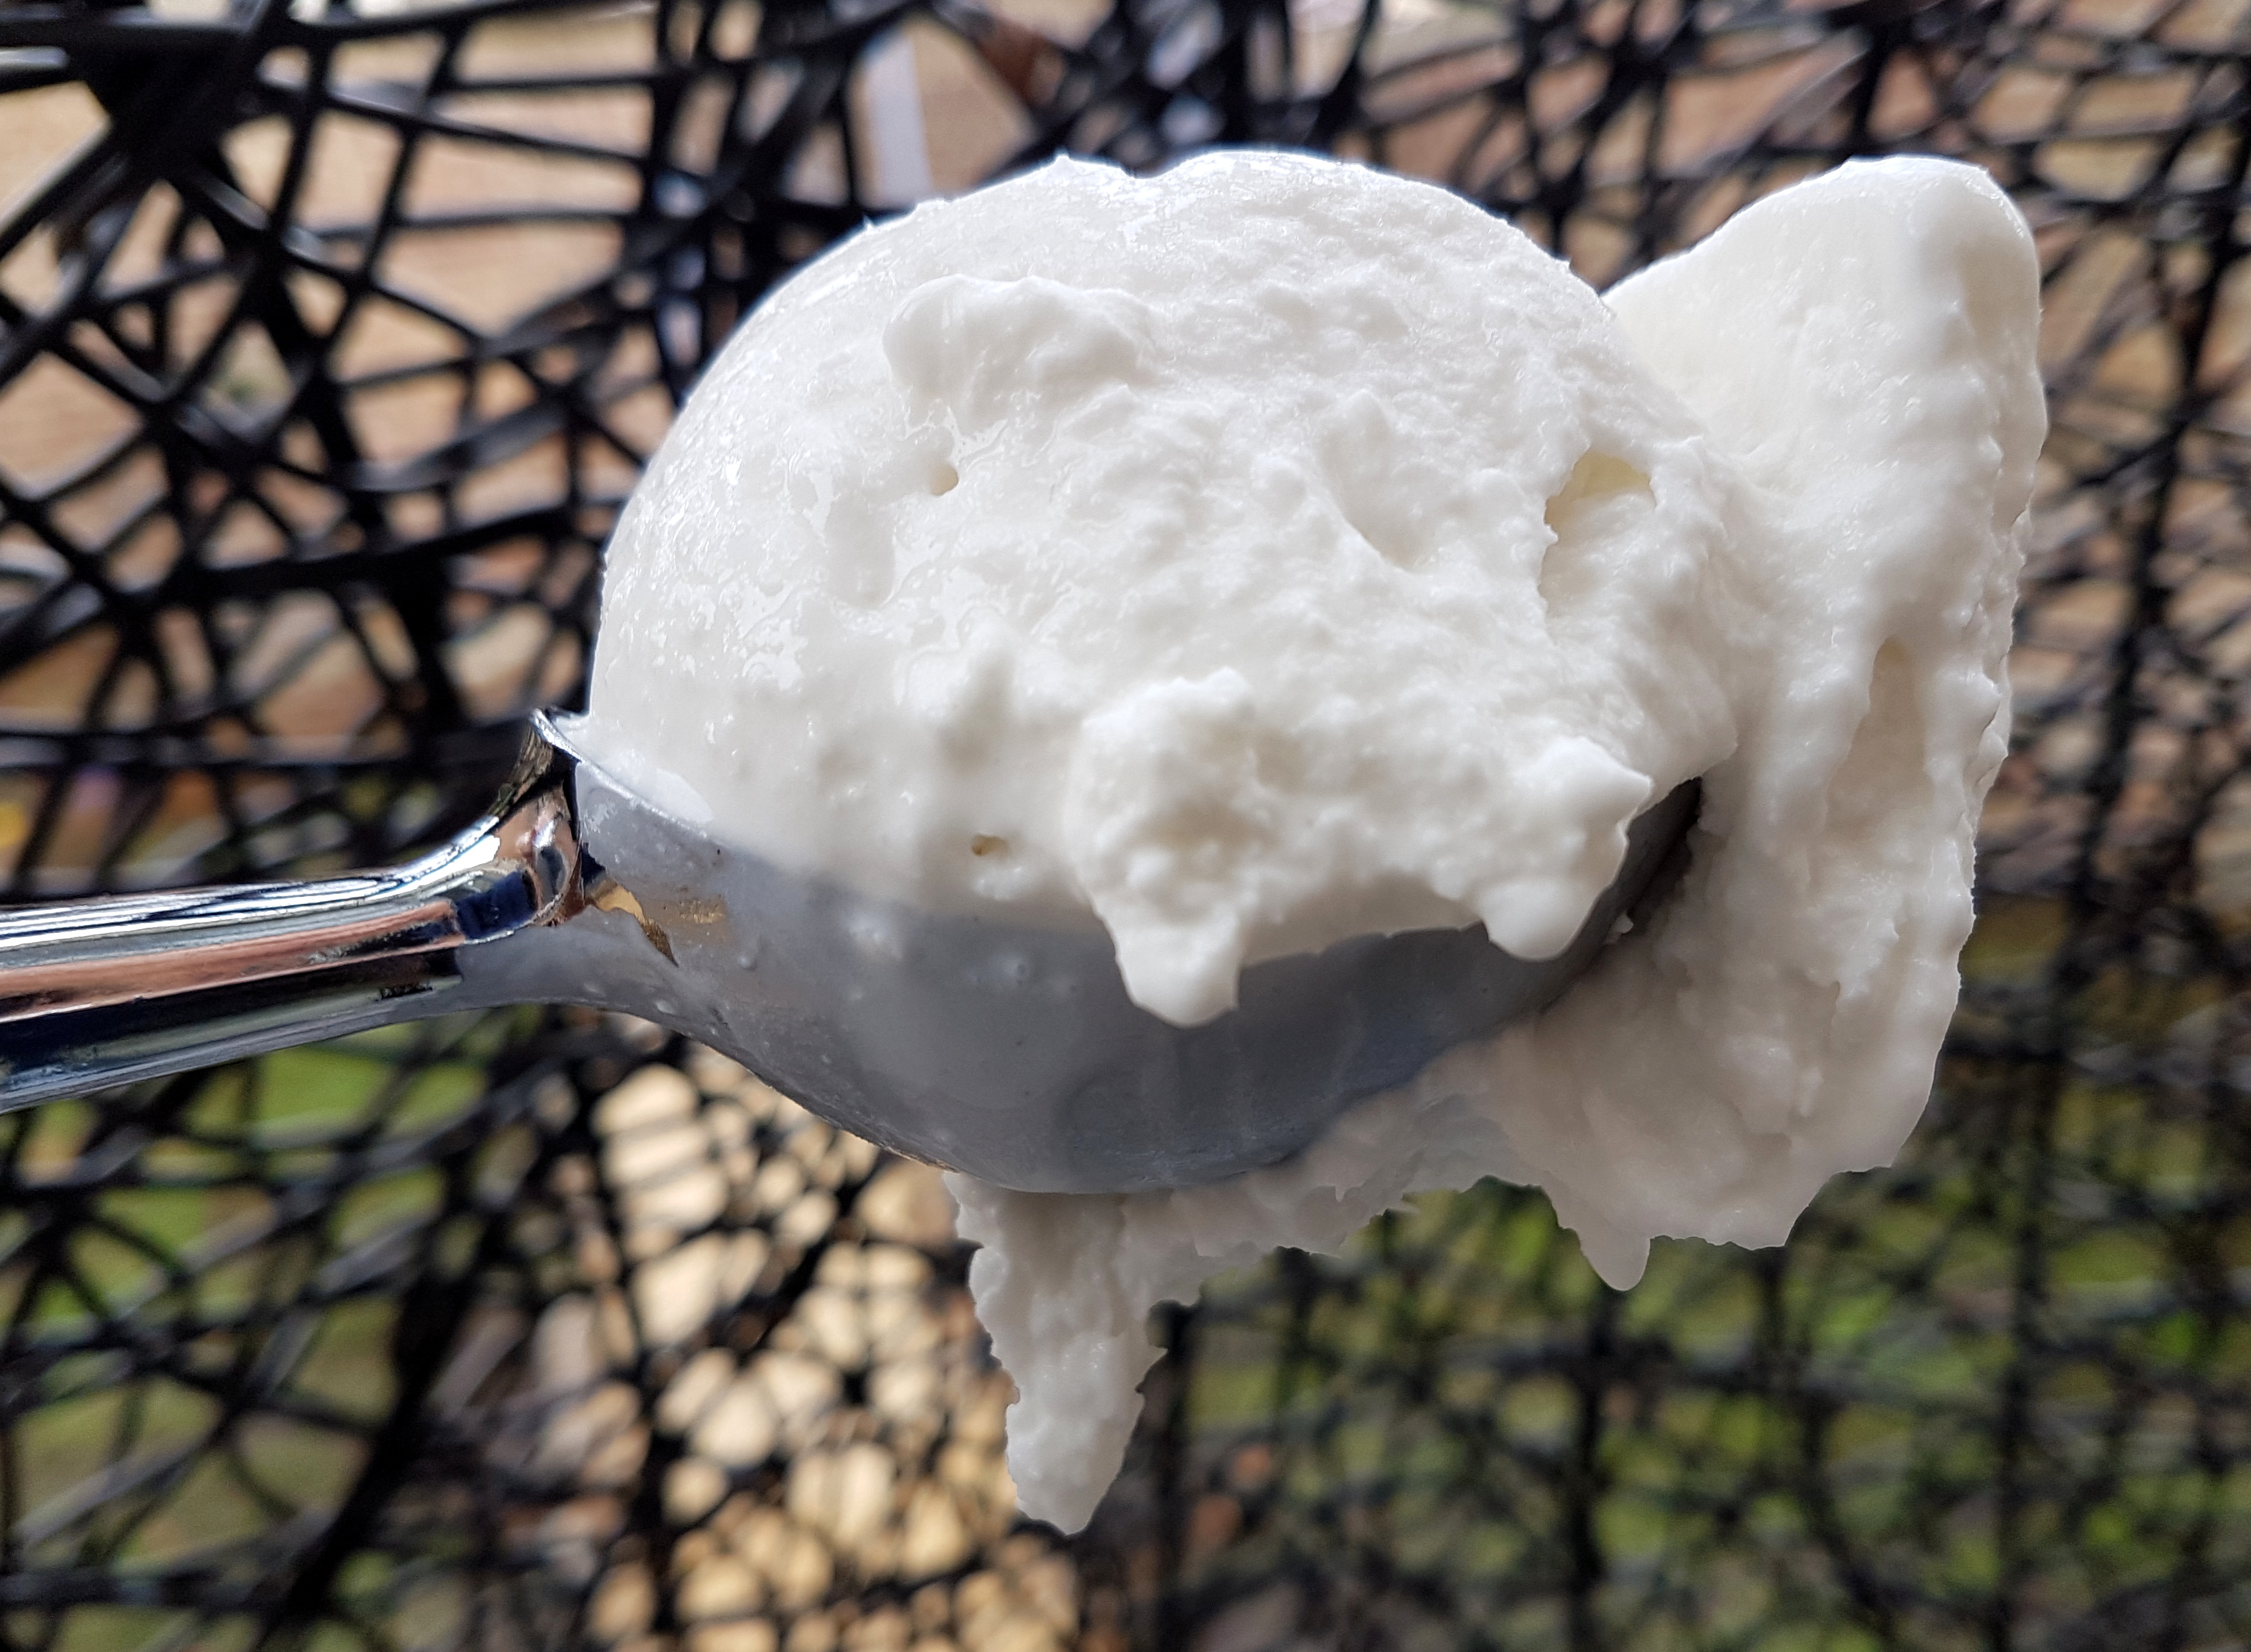
For the ice cream filling, you can basically use any ice creams. Since you won’t need much to fill a mochi, you won’t need much of it either (depending on the size of your mochis, I’d say one ball takes about less than a half scope): perfect for clearing out small amounts of ice cream you may have in your freezer! Personally, I used what I had left of a trio of ice creams: Belgian vanilla, vegan mochaccino … and a tasty plum sorbet (the latter a bit difficult since it was more prone to melt than the others).
Can you use any rice flour for the dough? The short answer is “no” (follow the link to read more about the differences).
How to make them – or “2-3 minutes in the micro wave fix the dough”
Make sure you get the right type of rice flour – the one you need is the sweet, glutenous type made of sushi rice
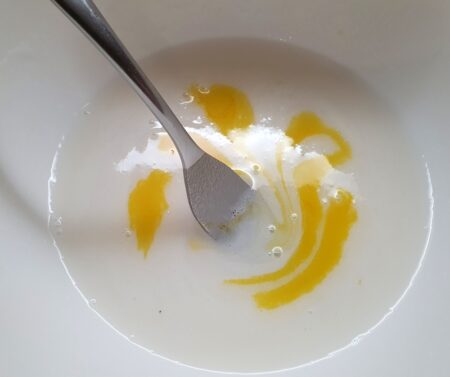
Yes, making the mochi dough is incredibly easy: mix the rice flour with water and sugar in bowl, and after 2-3 minutes in your micro wave oven you will have the dough!
If you want colours, just add a few drops of your preferred food colouring to the initial mix!


The red dough after about a minute in my micro wave oven (a 750 W-one). The exact time you’ll need will depend on the strength of your oven.
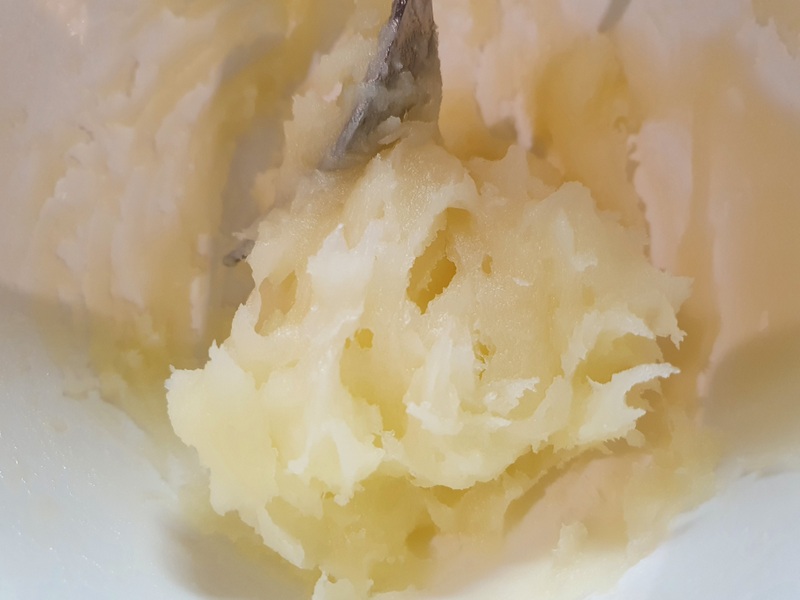
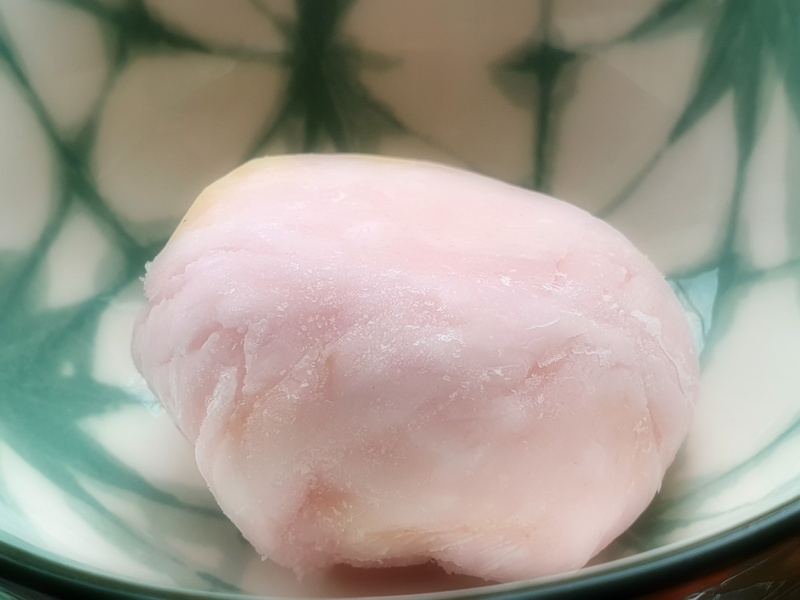
Almost there! The yellow dough is sticky and has a pleasant shiny look!
Some suggest using use corn starch for the dusting but I think that a more flavour-neutral starch like tapioca or potato starch might be a better choice. Or perhaps use some of that rice flour you have left!
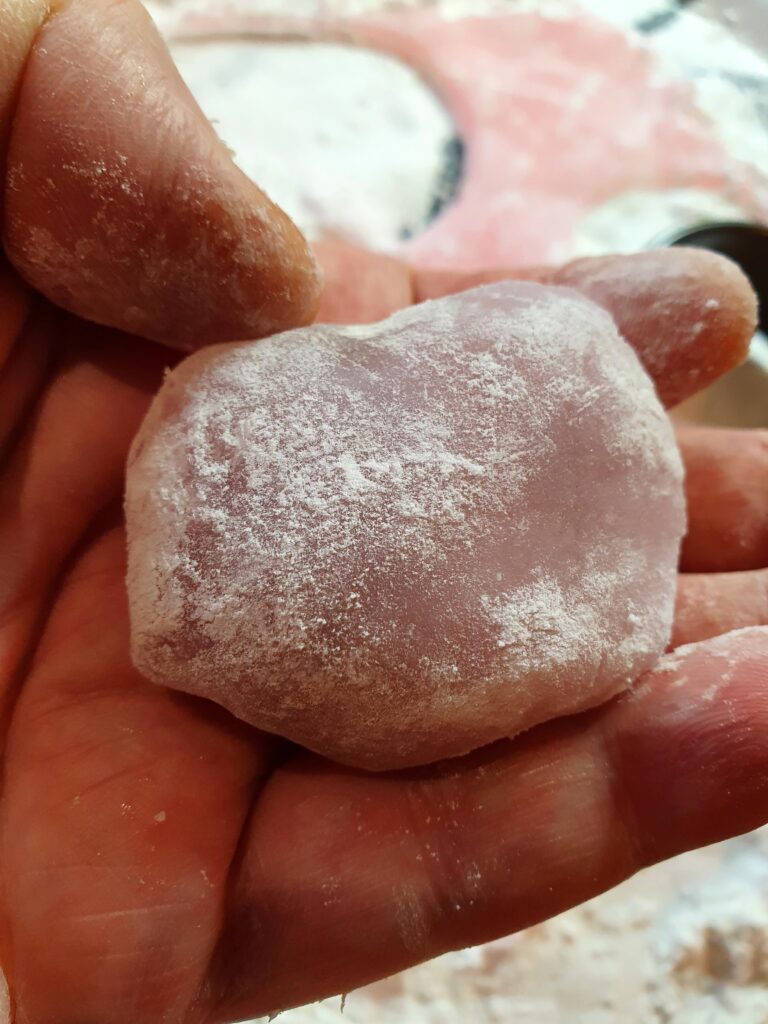
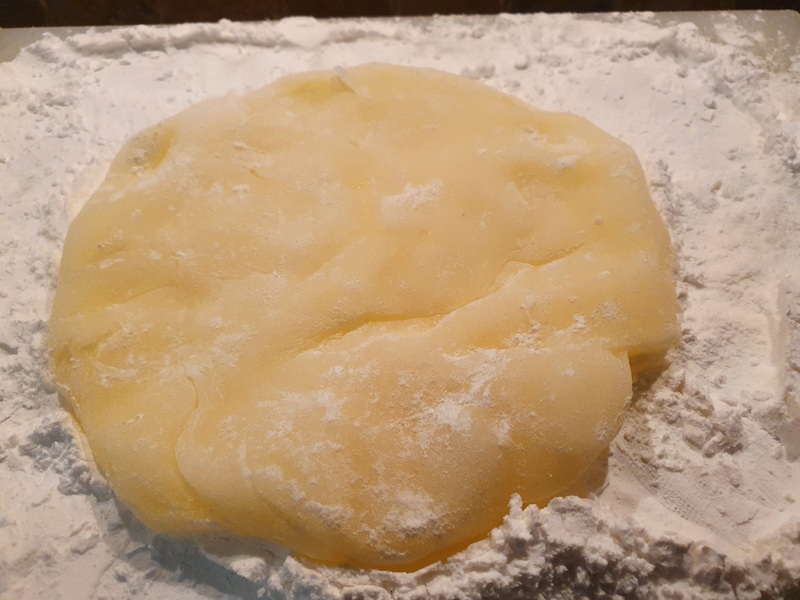
The dough will be sticky and quite hot to handle so make sure you have a well-dusted place to put it (and dust your own hands and tools too, to handle the stickiness).
The next step is simply to flatten the dough – use your hands, a rolling pin or whatever works for you. A suitable thickness to aim for would probably be about 3 mm (too thin and the dough will risk bursting when you do the wrapping). Then cut out circles of dough, large enough to wrap up your ice cream!
An alternative method – used for making “normal” Daifaku buns – would be to simply pick up some still warm dough and form a ball in your hand, hole it out, add the ice cream and close. This method, which works well with room tempered ingredients like red bean paste, may however be much more difficult with ice cream: the warm dough will cause unwanted melting which can make things quite messy.
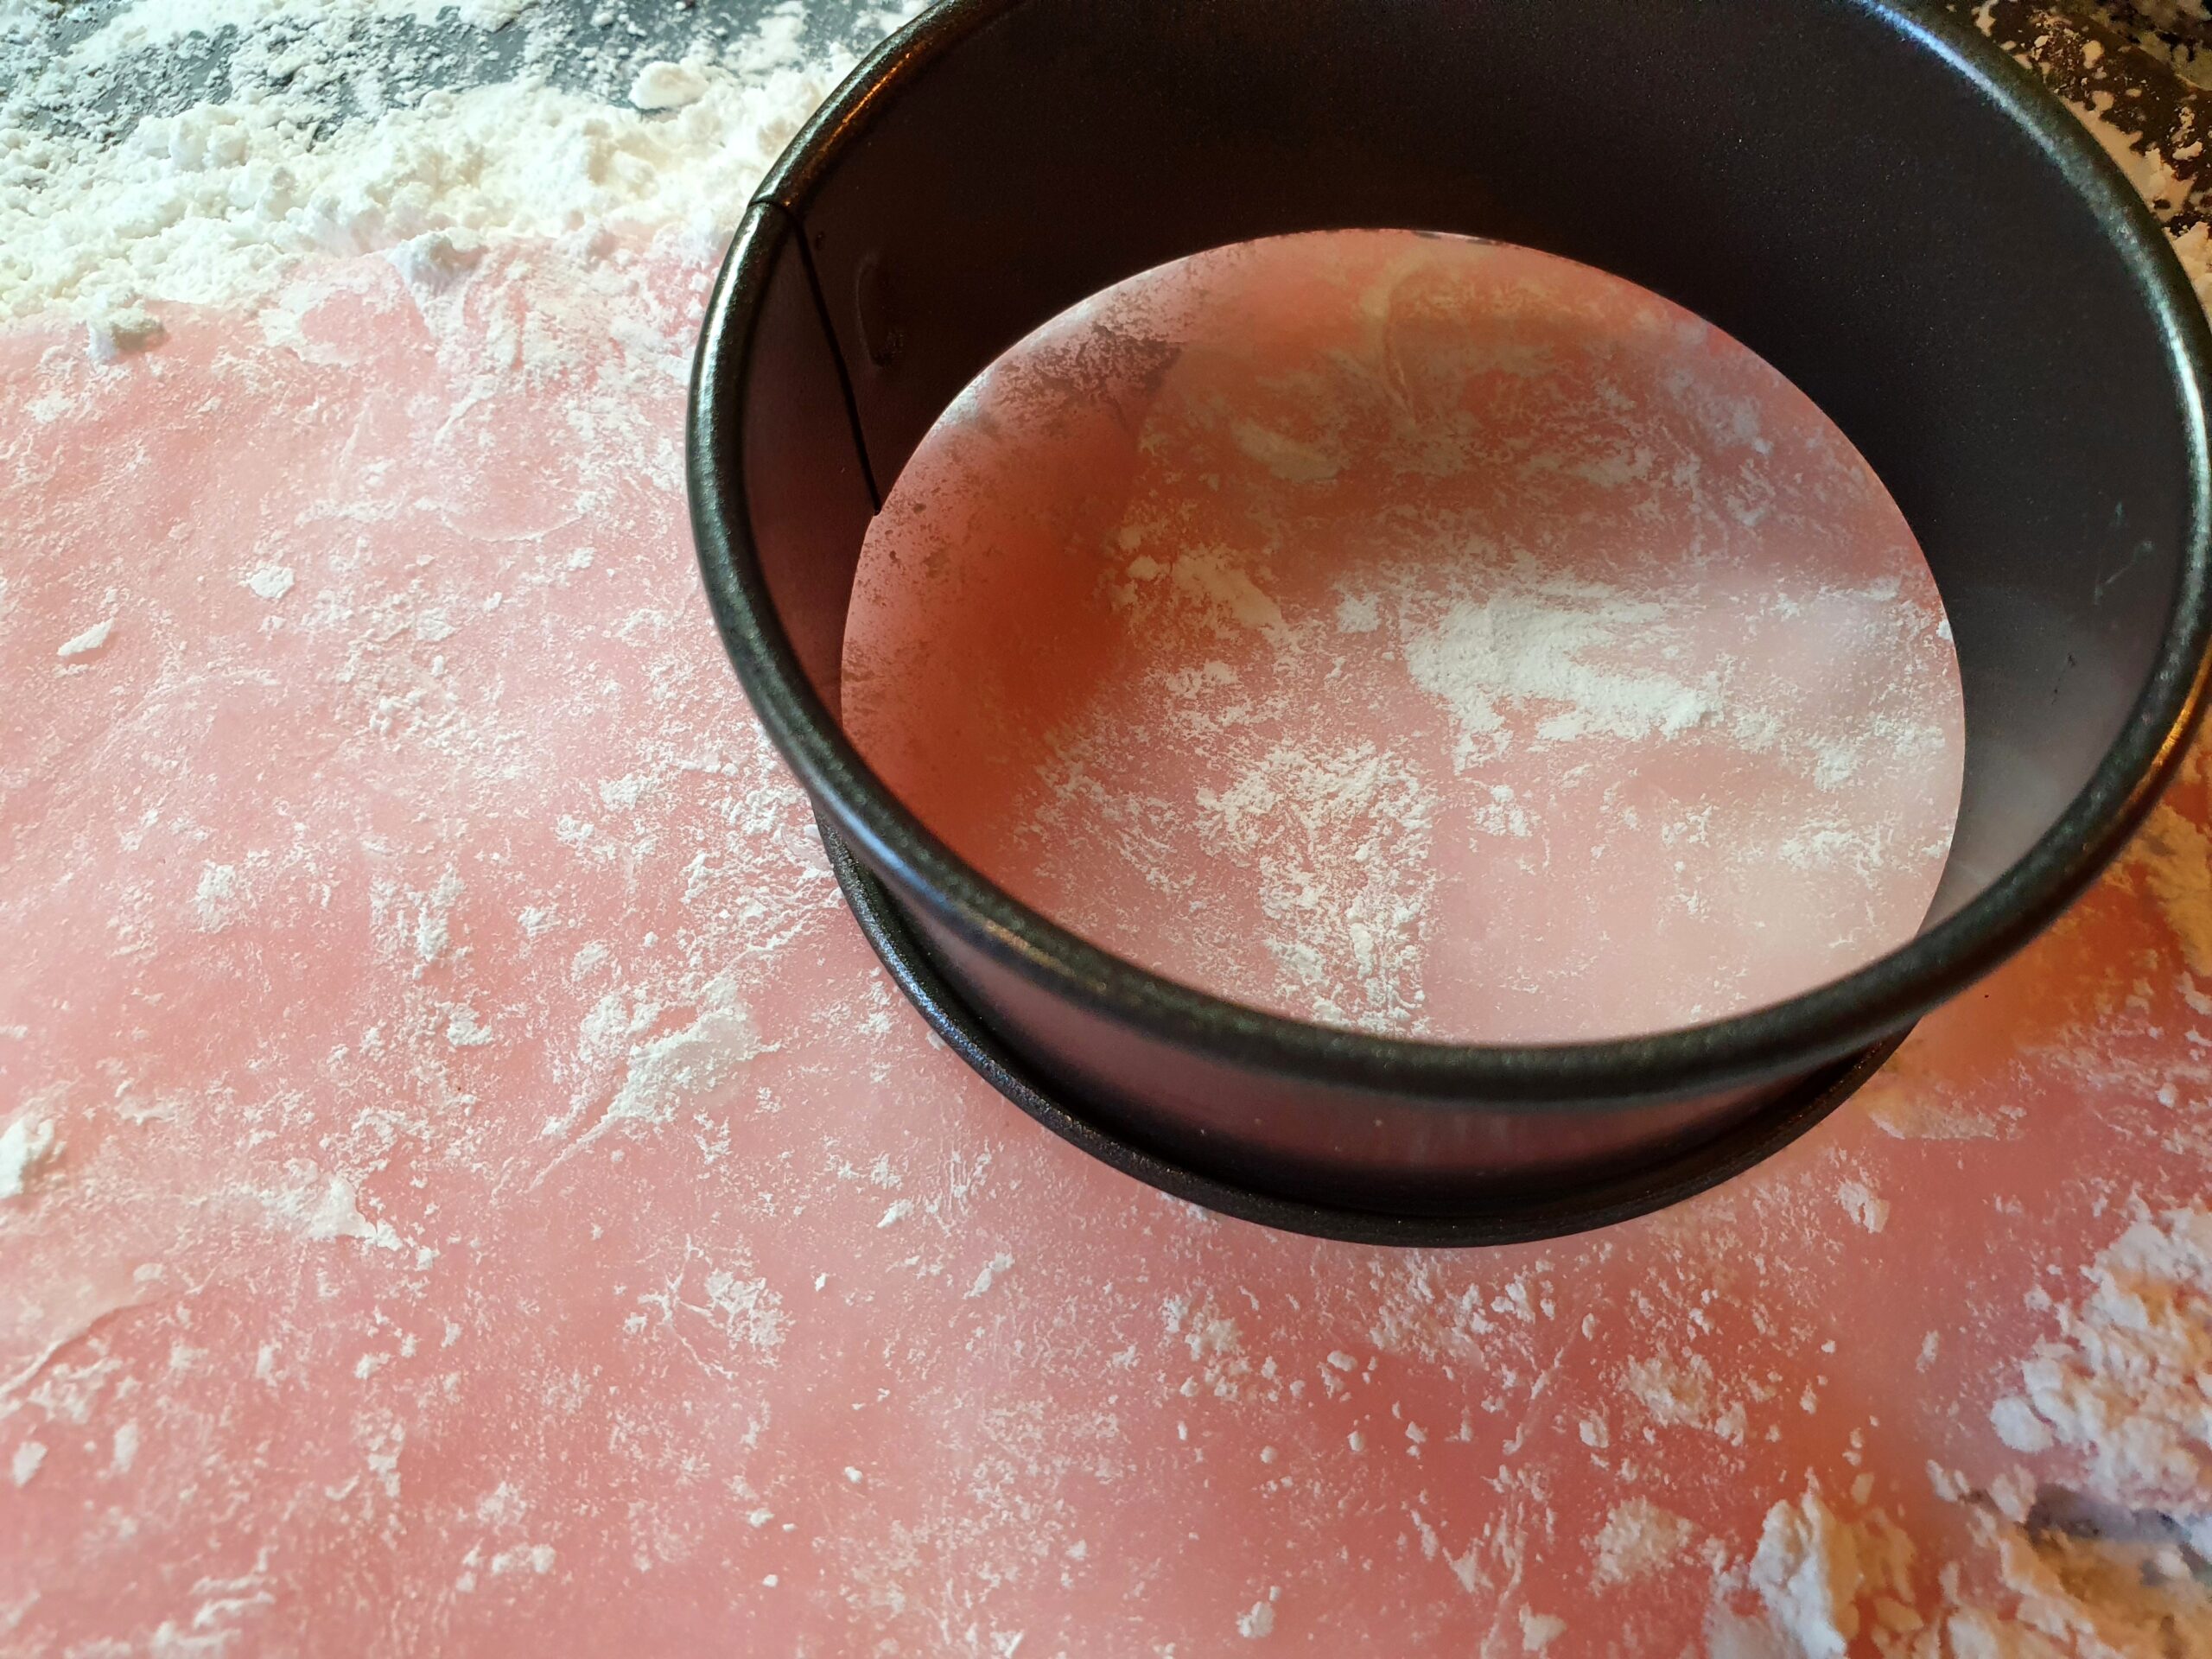
Use a cookie cutter, or turn a glass upside down, or … the most important thing is that you make the circles large enough to host the ice cream!
Since a warm dough quickly will start to melt your ice cream, let it cool down and possibly spend about 20-30 minutes in the refrigerator before you do the actual wrapping.
A good idea is also to only work with one mochi at a time – and only take out as much ice cream as you need for the one you’re working on: melting could otherwise be a problem even if you have let the dough cool downn..
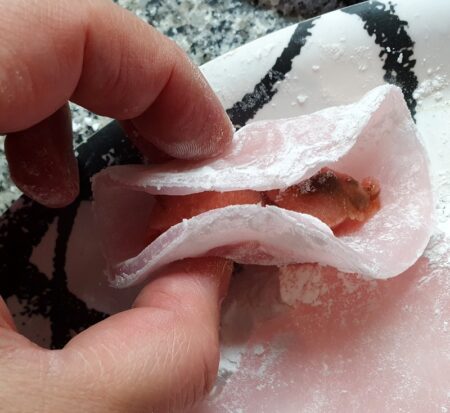
Work quickly, and ensure that the mochi has been properly “closed”!
Dusted and done! Time to put the mochi in the freezer to firm up an hour or more!
If your mochis don’t end up as perfectly round and evenly formed as commercial ones – don’t be too hard on yourself!
Mine were certainly no aesthetic wonders, but they still tasted good! And as we all know, practice makes perfect – nothing stops you from aiming for improvements!
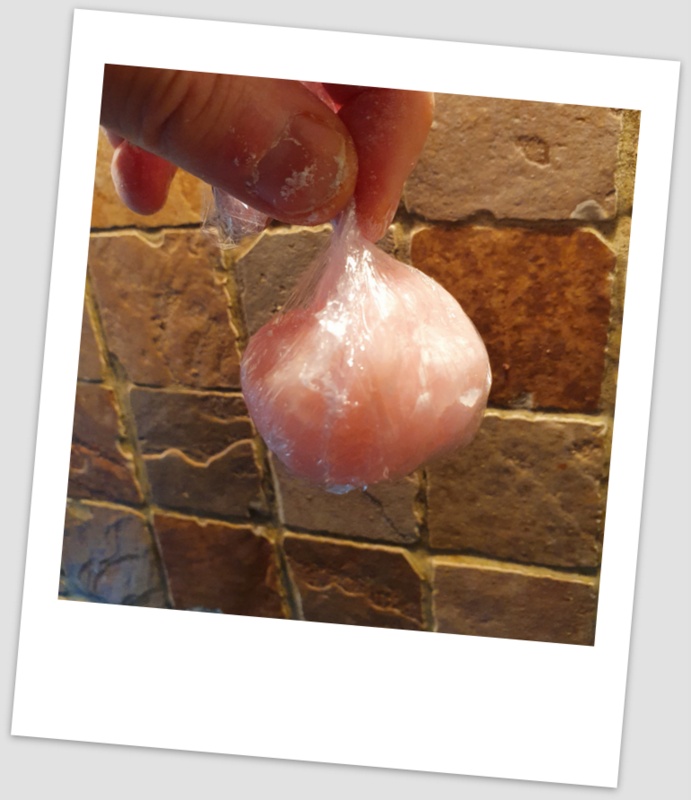
For best and rounder results – wrap and twist the mochi tightly inside a little plastic film before you put it in the freezer to firm up!
Mm … mm … Mochi!
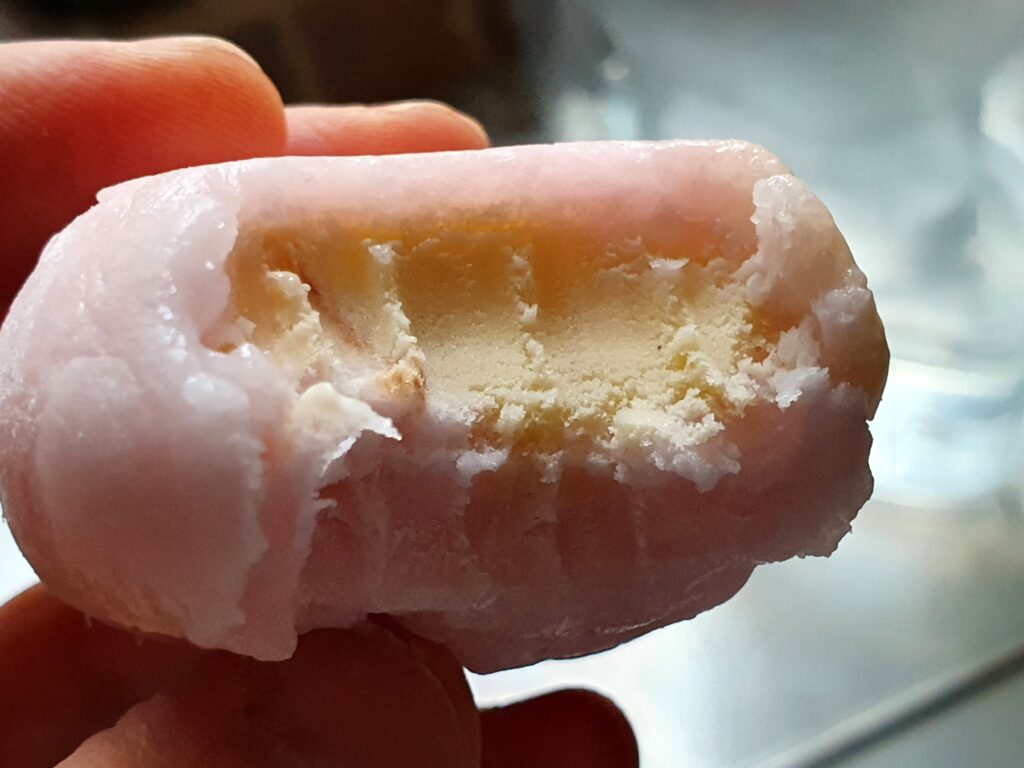
Mmm … the contrasting blend of the dough-wrap and the ice cream core is simply delicious!
While I happily admit that it is possible to make more good-looking mochis than mine, their taste was exactly as good as it should! The tender rice dough wrapping goes incredibly well together with ice cream: it has a pleasant, very subtle and non-intrusive flavour of its own and its chewy texture offers a tasty contrast to any ice cream put within. This “packaging” also makes the mochi a self-standing, pre-sized dessert portion: something which can be useful both when you want to entertain others and when you want to indulge yourself but still be mindful about the calories. Since the mochis don’t require much ice cream to fill, they are also quite budget-friendly and perfect great for any small quantities of left-over ice cream you may have you can use whatever you may have at home.
Go ahead and make some – I know you want to!
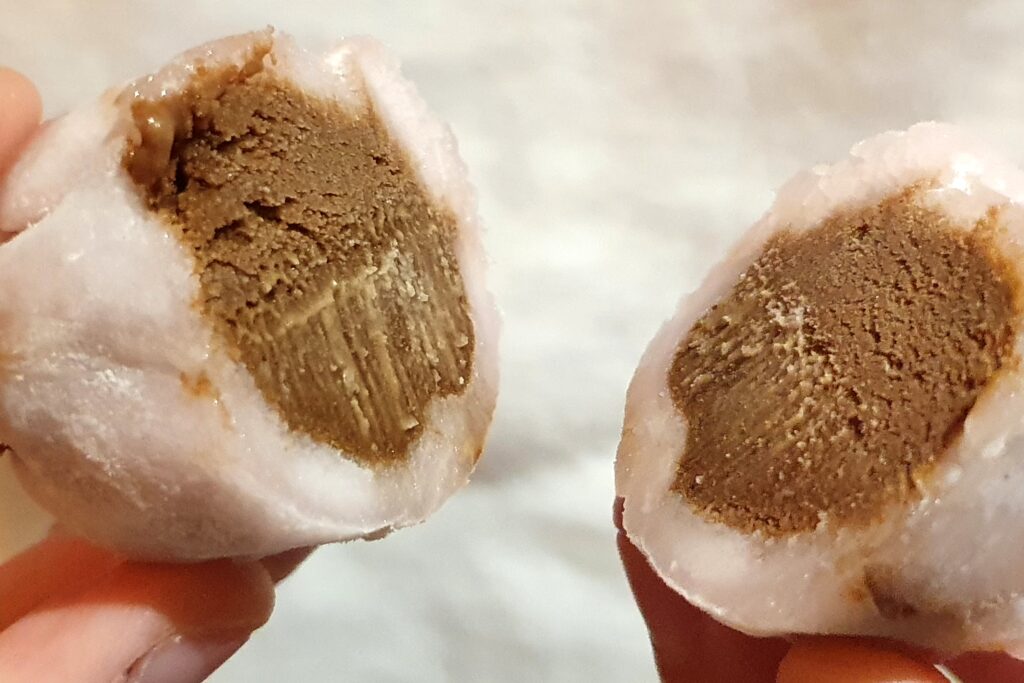
The Mochachino Mochi ice creams were also great!
- 120 ml (1/2 cup) sweet glutenous rice flour
- 180 ml (3/4 cup) sugar
- 180 ml (3/4 cup) water
- Optional: food colouring of your liking
- For dusting: about 120 ml (1/2 cup) or so of potato flour, tapioca starch, rice flour or similar
- Filling: A few (half-)scopes of your favourite ice cream(s)
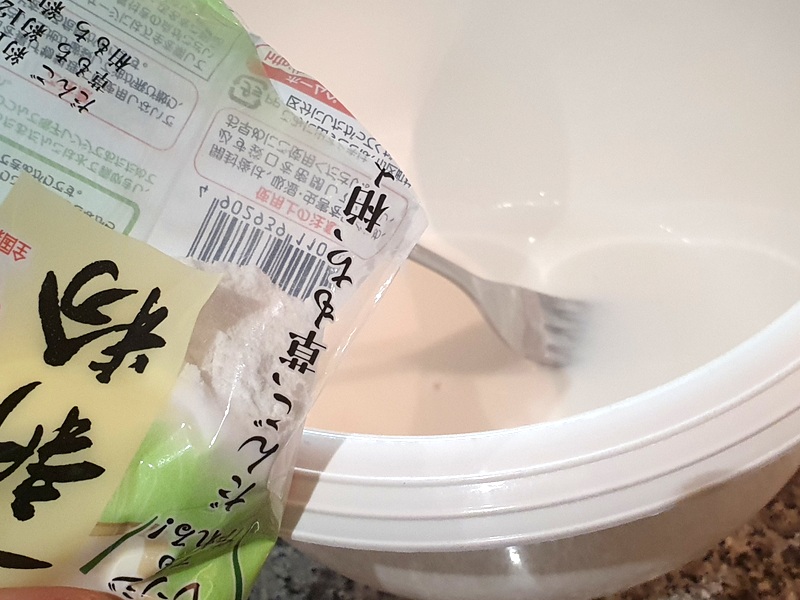
- Put the rice flour in a micro-wave safe bowl and mix well with water.
- Add the sugar and - if using - food colouring. Mix well.
- Cover (preferably) the bowl with a plastic film with a couple of holes in, and put in your micro wave oven.
- Micro-wave for about 1 minute, stir the dough, then micro-wave for about another minute.
- Work the dough a little and micro-wave some more until ready (possibly plus 2 x 30 seconds but would depend on your micro-wave; check in between - the dough should be sticky but formable, and the colour should be a bit shiny and verge towards the pale).
- Dust a plate with your preferred (taste-less) starch and place the dough there. Dust the sticky dough for easier handling and let cool down a little.
- When still warm but cool enough to handle, flatten the dough with a rolling pin (dust the pin before using!) or with your hands (dust them too!).
- Let the flattened dough cool down further, say for about 20-30 minutes in your refrigerator.
- Take out and make circles with a suitable glass or cookie cutter: remember to make the circles big enough to host the ice cream content and still be possible to close!
- Place about half a scope or less of ice cream on one of your dough circles and close them.
- To ensure a better shape while freezing, wrap the mochi tightly in some plastic film (and put them in the freezer).
PS. If you feel for a less cold dessert, you can stay traditional and fill the mochi dough with other nice, sweet things than ice cream too! Sweet red bean paste is a tried and tested favourite filling …