The Ice-Cold Hand of Halloween
Yes, it is that time of the year now. And thinking about classic horrific hands on the loose, I remembered Thing (or The Thing) – the hand who faithfully served the Addams family.

When I was a little kid, I used to watch glimpses of the (original, black and white TV-version of) The Addams family, hiding behind my grandmother’s back. At the time, I never realized that the TV-series was supposed to be funny: I was convinced this was real horror. And actually, at my tender age and with characters like the butler Lurch suddenly appearing on the screen, I think my frightened perception of the Addams was true enough – for me, at least 😉 .

What sensible kid in the pre-school age would NOT shudder when Lurch arrived on the screen?
Years later, I came to appreciate the Addams family and the fun the series contains. But somewhere, I have a feeling that my initial fear has added a certain dimension of appreciation for the macabre family. Which also included the Thing (or just “Thing”, as he usually was addressed). And while there certainly have been a lot of dismembered hands on the loose in the canons of horror, none has made such an impression on me as Thing.
Making a Halloween hand
First, let me admit that this could have been done in vastly more advanced ways (creating elaborate moulds, using “toy hands” as moulds etcetera etcetera) but I aimed for simplicity rather than perfection. After all, I had a feeling that the kids would enjoy it anyway (they did!).
So, I began by getting myself a package of those cheap, disposable plastic gloves that typically can be found wherever you can buy paint. Then, being conscientious about hygiene, I washed and rinsed the glove to be used.
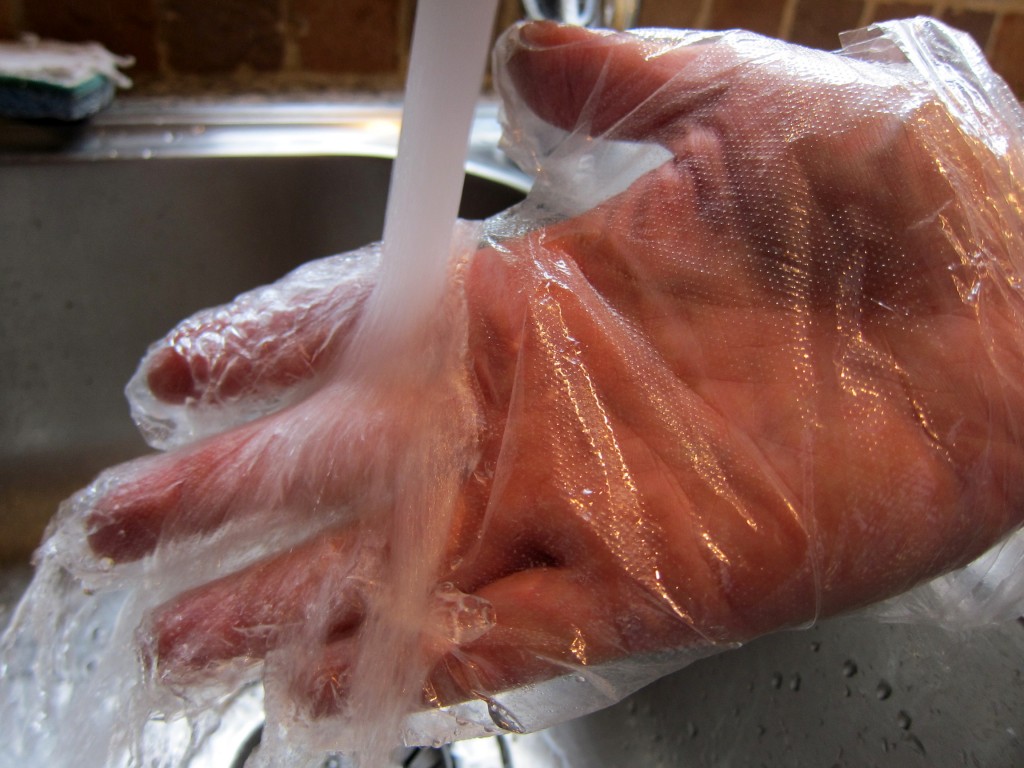
Keep it clean!
Leave the plastic glove to dry off a little, and prepare a simple batch of Sicilian gelato base (I used the Arrowroot-type, but corn starch would do fine too). The recipe is exactly the same that I used to create the Monster ice cream, if you remember that one. This time, however, I skipped the food colouring, but this is of course something you might want to consider.
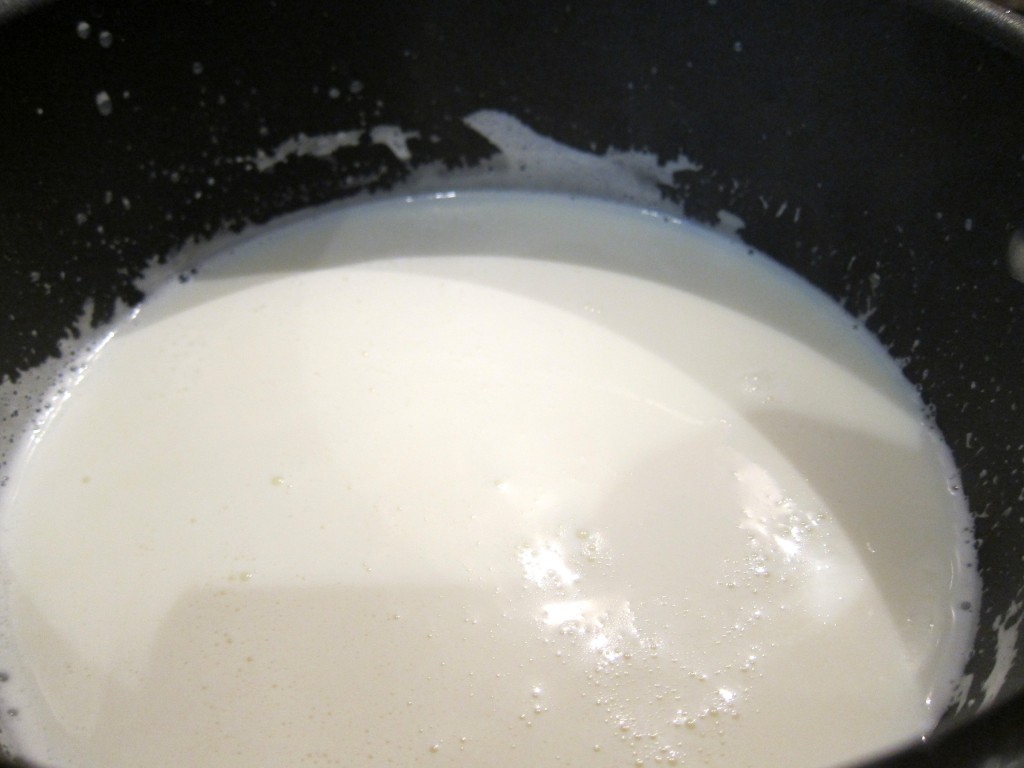
The easiest, most versatile cooked ice cream base I know – Sicilian gelato: the perfect choice also when you have no ice cream machine!
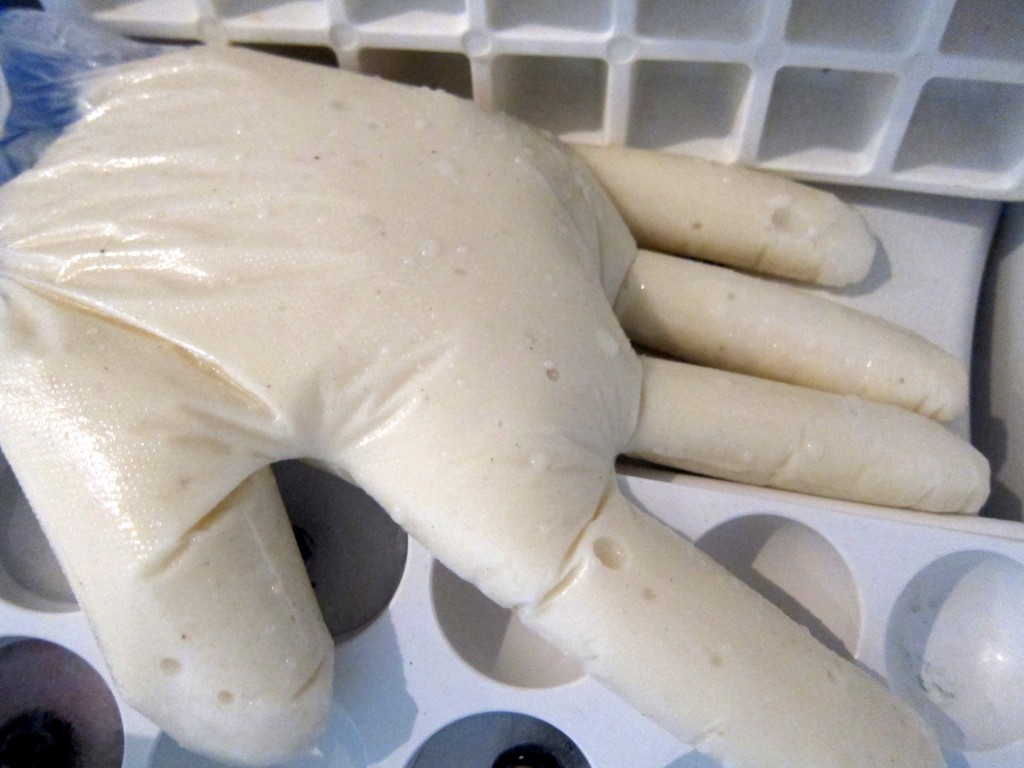
Once the base is ready and has cooled down (and, preferably, even chilled for some time in the refrigerator), I churned it for about five-ten minutes in the ice cream machine: the idea was to bring the ice cream base beyond the “liquid stage” and more towards the “slushy” stage before filling the plastic glove (if the ice cream base becomes too firm, it will be difficult to fill the plastic glove, particularly the fingers).
But if you have no ice cream machine, just fill the plastic glove with the cooled-down ice cream base and put it straight into the freezer.
In the freezer
And you may want to be a bit careful and put on a second plastic glove or at least do the filling over a bowl – these cheap plastic gloves have a certain tendency to break (do check that there are no holes in the glove to start with, by the way!).
When your hand begins to firm up in the freezer, you may want to position it/shape it a bit. One simple idea is, for instance, to put a small ball under the palm, to avoid a too flat-looking final frozen hand.
Frozen and in shape
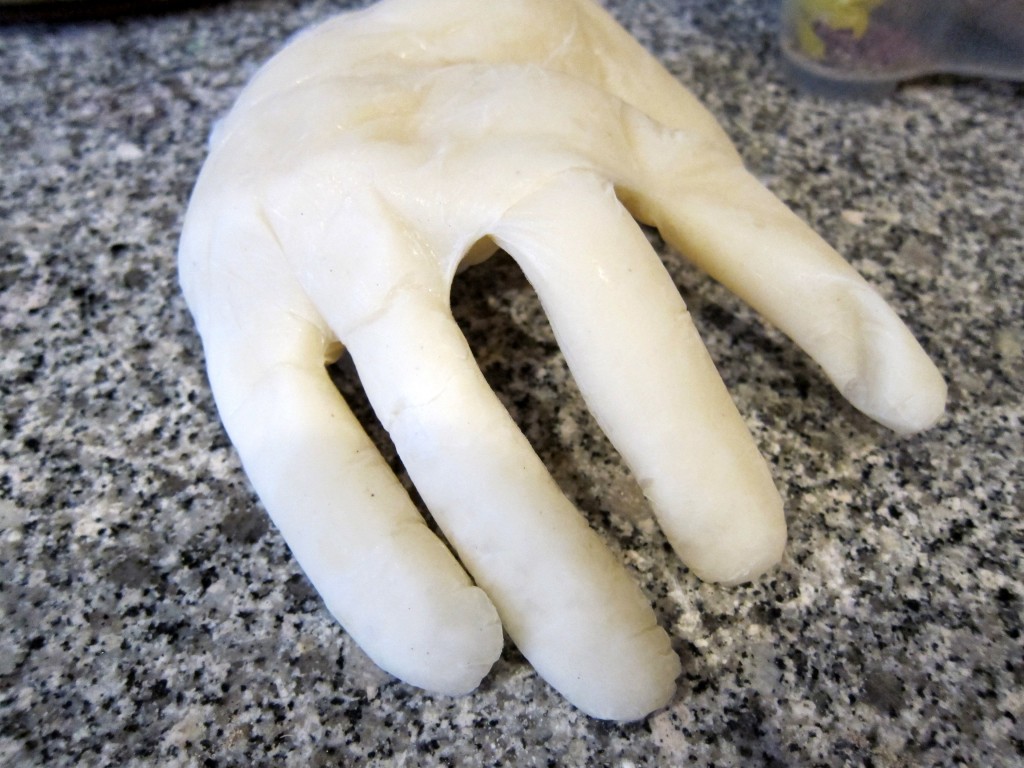
Once the hand has frozen firmly and it is time to serve it, carefully remove the plastic glove (using a knife if it becomes tricky …) and position the hand as you please.
As I told you, I aimed for simplicity so I just placed the hand on a plate, with the fingers laid out over a few scoops of red raspberry sorbet. You can, of course, be about as elaborate as you like here.
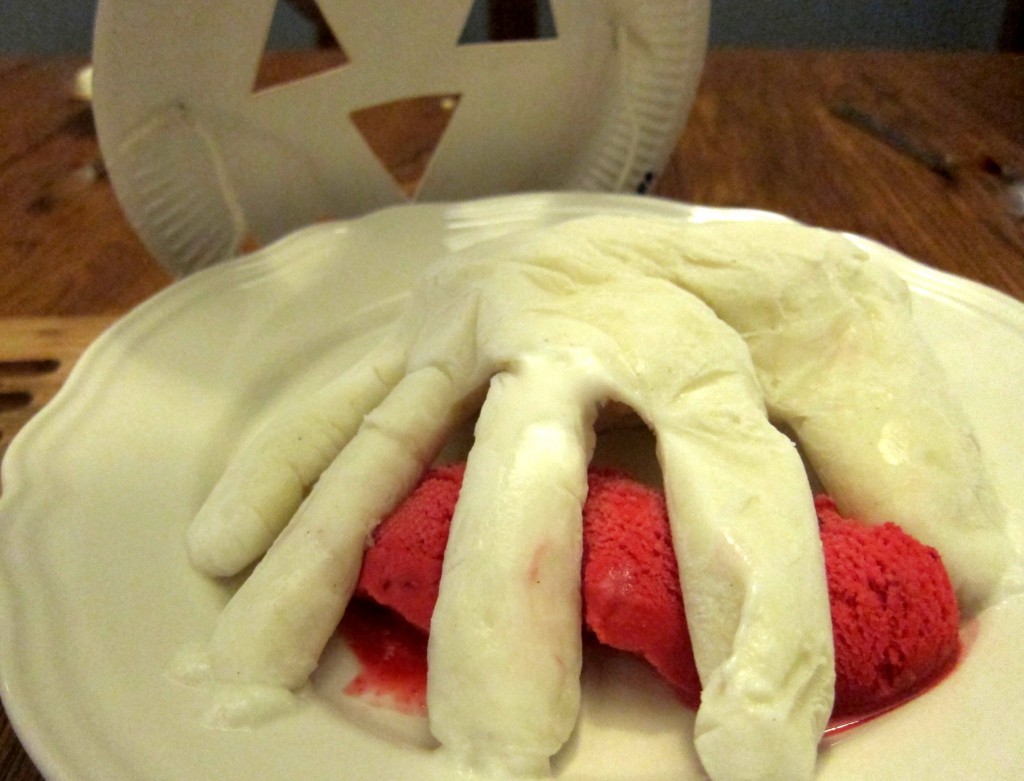
Halloween is near, and the Hand has just laid its fingers on a few blood-red scoops of raspberry sorbet
The Hand – despite not being any particular wonder of sophistication – was greatly appreciated by the whole family, making for a fun and macabre dessert! The kids particularly approved of the combination with the blood-red raspberry sorbet – when the ice creams began to melt, the combination became even more horrifying … 😉
So, all thumbs up for this frozen Halloween-horror!
- 1 simple plastic glove (of the cheap, disposable kind)
- 700 ml (about 3 cups) whole milk [optionally, substitute some of the milk for cream, which will make the ice cream richer (and fatter). I would only replace 100-200 ml (0.4-0.8 cup), by the way. ]
- 125 ml (a full ½ cup) sugar
- about 5 tablespoons of Arrowroot starch [or other suitable starch, but then you lose out on the funny consistency and the glossy finish]
- (optional) pinch of salt and/or a little vanilla powder or vanilla sugar
- Wash and rinse the plastic glove, making sure it has no holes or leaks.
- Whisk together 100 ml (about 0.4 cup) of the cold milk with the Arrowroot starch, making sure that there are no remaining lumps. Set aside for now.
- Blend the remaining 600 ml (about 2.5 cups) of the dairy, the sugar, (and the optional pinch of salt/the vanilla) in a sauce pan. Warm until steaming hot (not boiling!) on medium heat.
- Blend the Arrowroot starch mixture with the rest of the ingredients in the sauce pan and whisk away. Since Arrowroot thickens at lower temperatures than corn starch and also does not react well to overheating, limit the continued cooking to a couple of minutes or so).
- Whisk well and let the mixture cool down.
- Refrigerate the base for a couple of hours, then churn according to the instructions of your ice cream machine but only to the "slushy stage" (if you have no ice cream machine, just chill the base in the refrigerator and continue from here).
- Now, fill the plastic glove with the ice cream base.
- Put the hand in the freezer and leave to freeze (if you want to "position" the hand, wait until it is half-frozen, and consider creative ways of leaving it to finish freezing over some suitable object, like a ball under the "palm").
- When it is time to serve the ice cream hand, take it out from the freezer and remove the plastic glove (using a knife is highly recommended).
- Serve as elaborate as you like. The combination of the Hand with a few blood-red scopes of raspberry sorbet was very popular in our household 🙂

– Thank you, Thing!